Schedule Recurring Builds in App Center
Leverage an Azure Timer Function (a cron job in the cloud) to trigger a build every night in App Center Build

Let's explore how to schedule recurring builds in App Center using Azure Timer Functions
Today, App Center Build offers a continuous integration solution for iOS, Android and UWP apps that will trigger each time we commit code to our repository. However, it doesn't yet allow us to schedule recurring builds.
Luckily, App Center has a complete suite of APIs we can leverage to schedule an Azure Timer Function (essentially a cron job in the cloud) to trigger a build every night.
This walkthrough shows how to gather the required metadata and API Token from App Center, then how to build an Azure Timer Function that will trigger a build via the App Center APIs.
For a complete solution, see the UITestSampleApp.Functions project in this repo: https://github.com/brminnick/UITestSampleApp
1. Get App Center Metadata
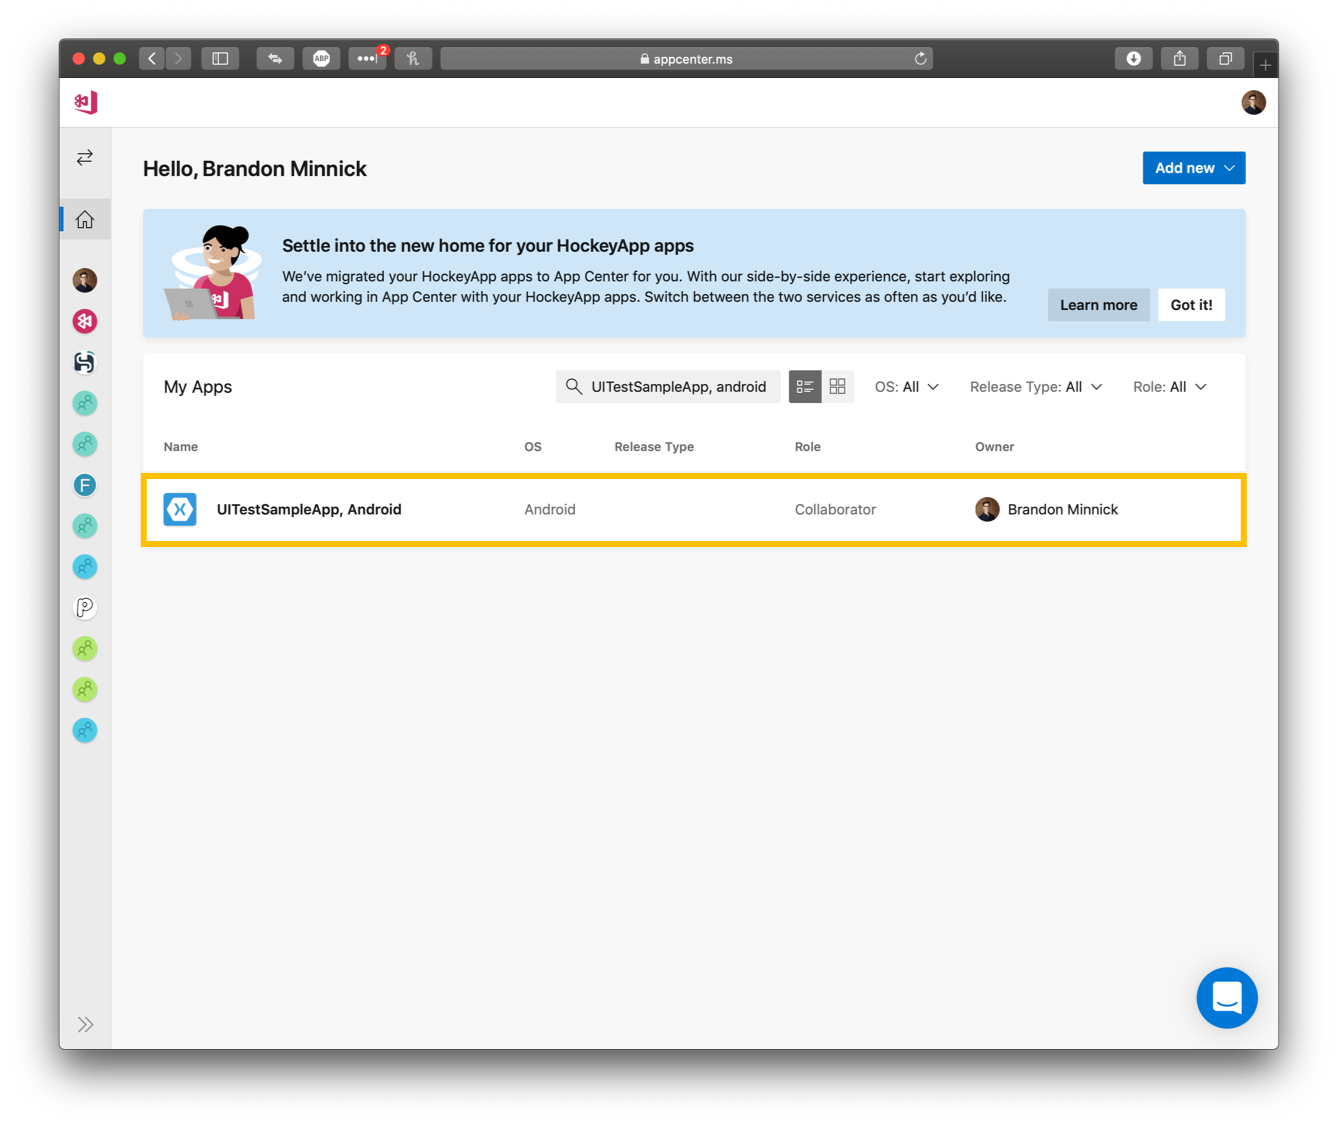
First, let's grab our App Center app's name, owner and branch metadata
- In the App Center Portal, click into the app
- Note: My app is called UITestSampleApp, Android
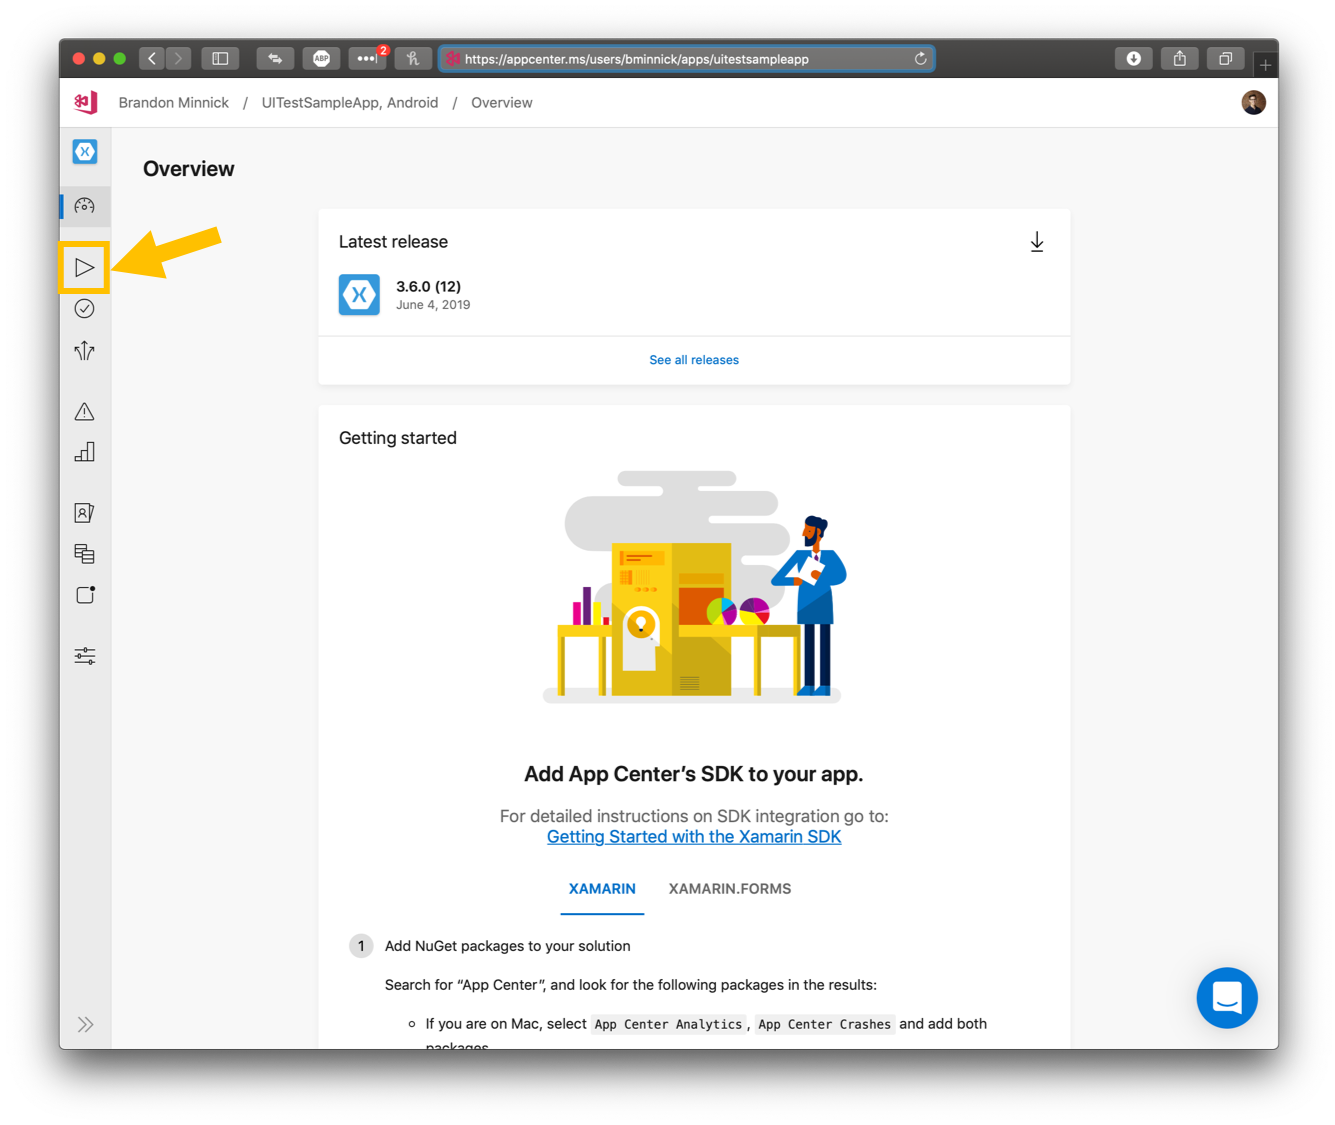
2. In the App Overview page, click on the Build
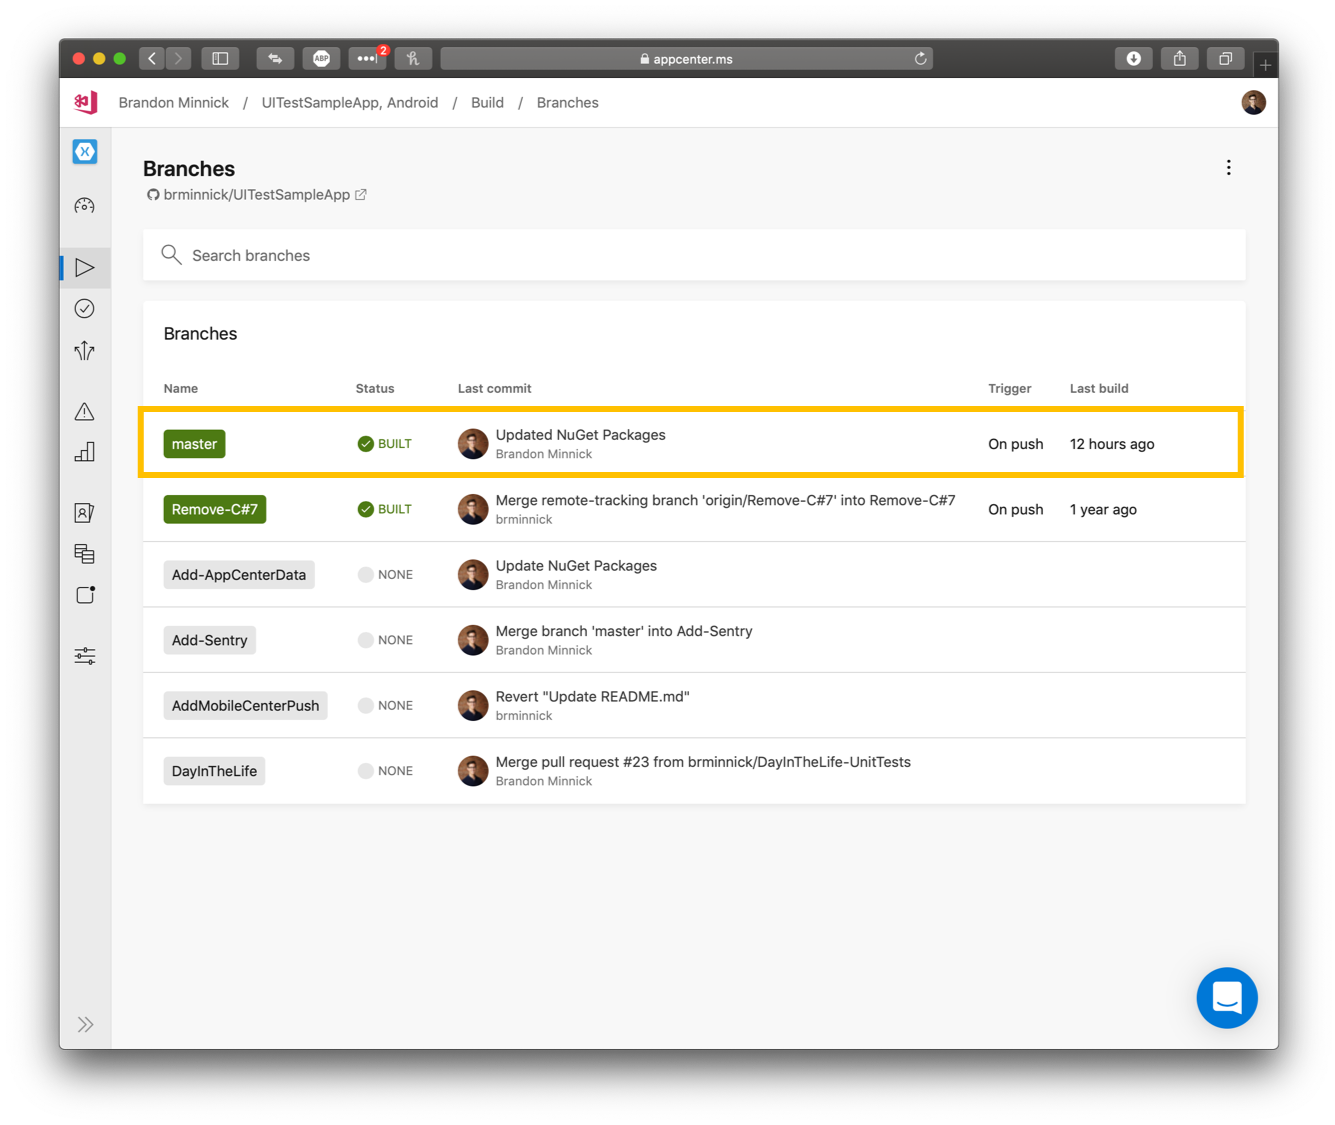
3. On the Branches page, click into the branch for which you'd like to schedule a recurring build
- Note: I am using the master branch
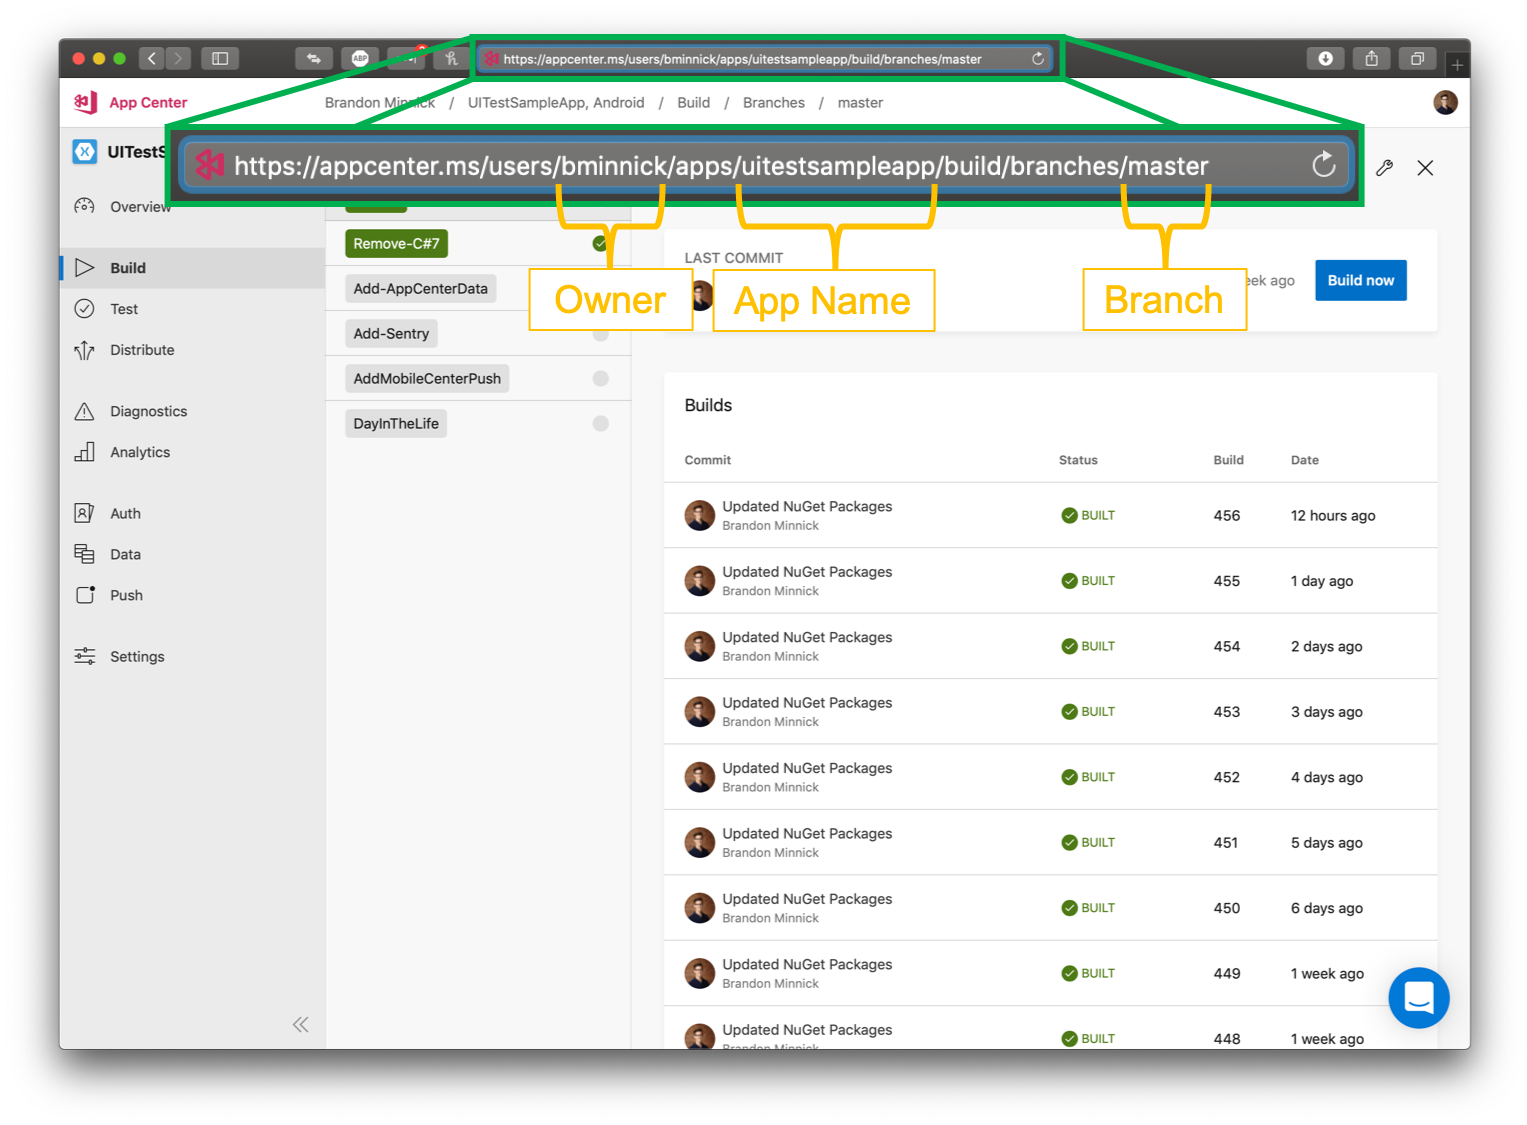
4. On the Builds page, using the URL, copy the values for the Owner, App Name and Branch
- Note: The URL will follow the following pattern: https://appcenter.ms/users/{owner_name}/apps/ {app_name}/build/branches/{branch_name}
2. Generate App Center API Token
Next, let's generate a token in App Center that we'll use to access our API.
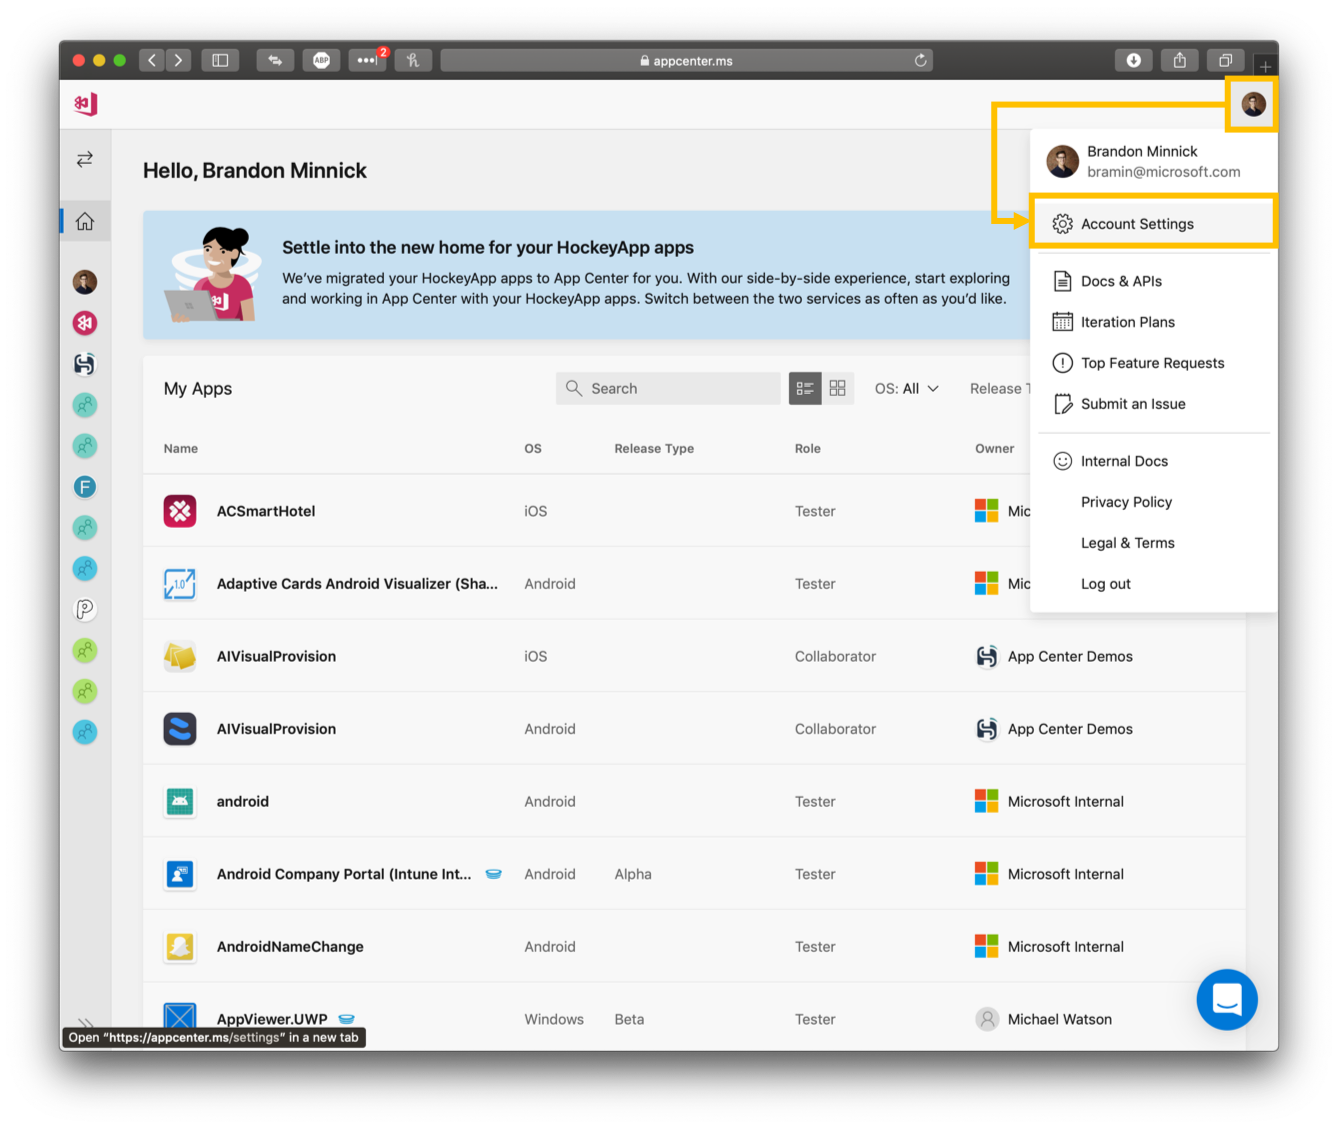
- In the App Center Portal, on the top-right, click on your profile photo
- In the settings drop-down, select Account Settings
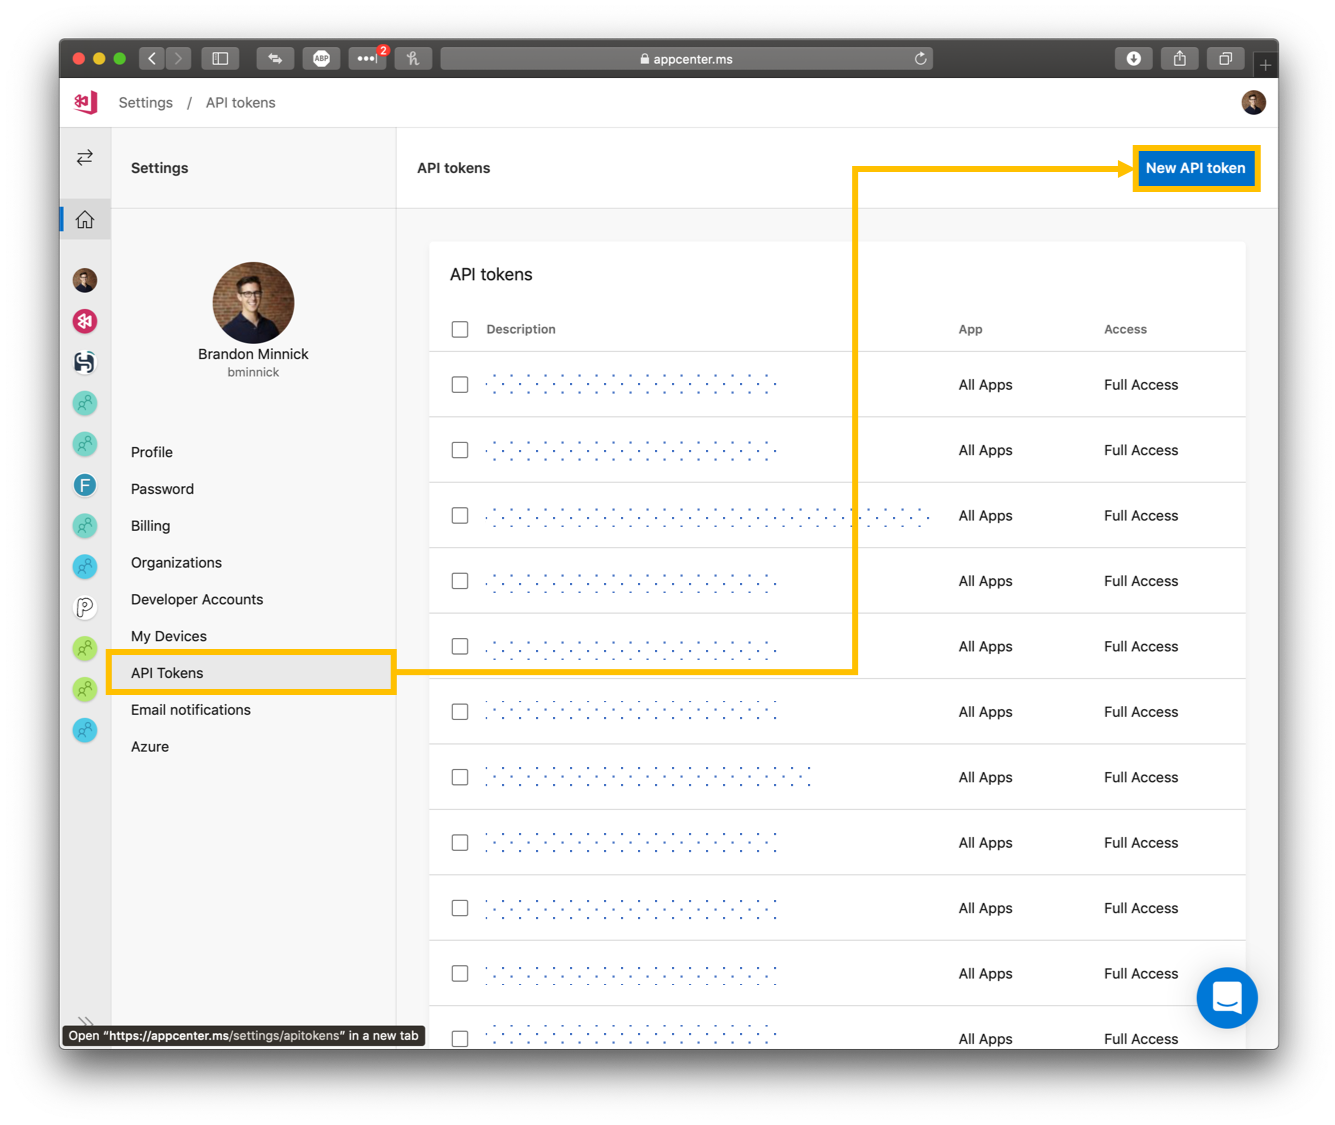
3. On the Account Settings page, click API Tokens
4. On the API Tokens page, select New API Token
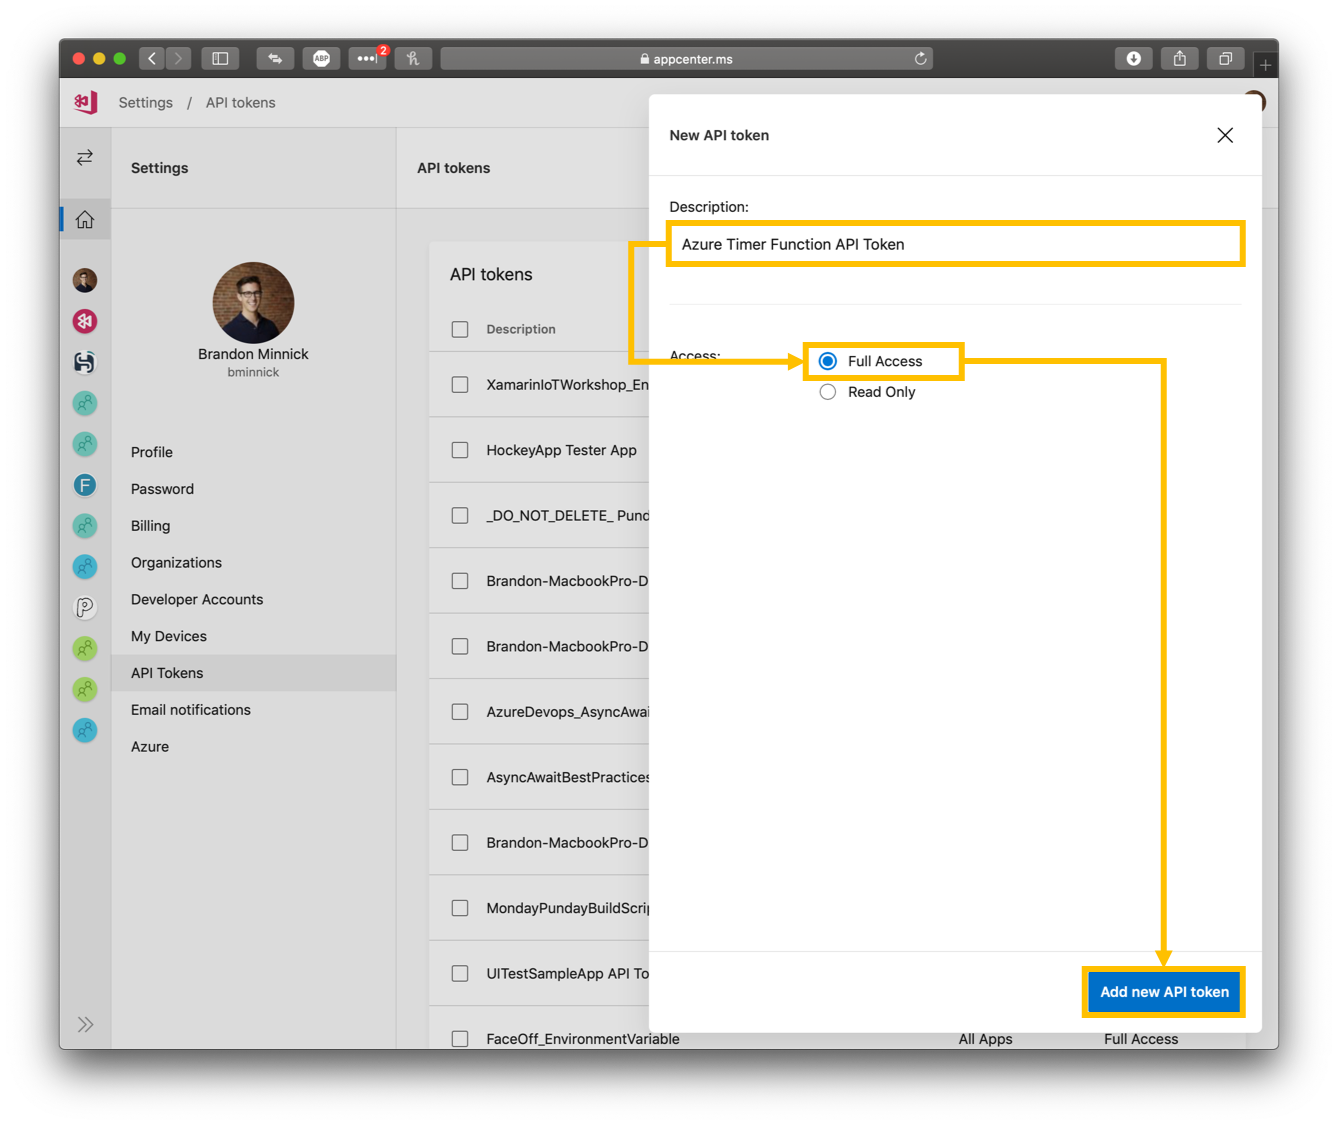
5. On the New API Token page, enter a Description
- Note: For my description, I used Azure Timer Function API Token
6. On the New API Token page, select Full Access
7. On the New API Token page, select Add new API token
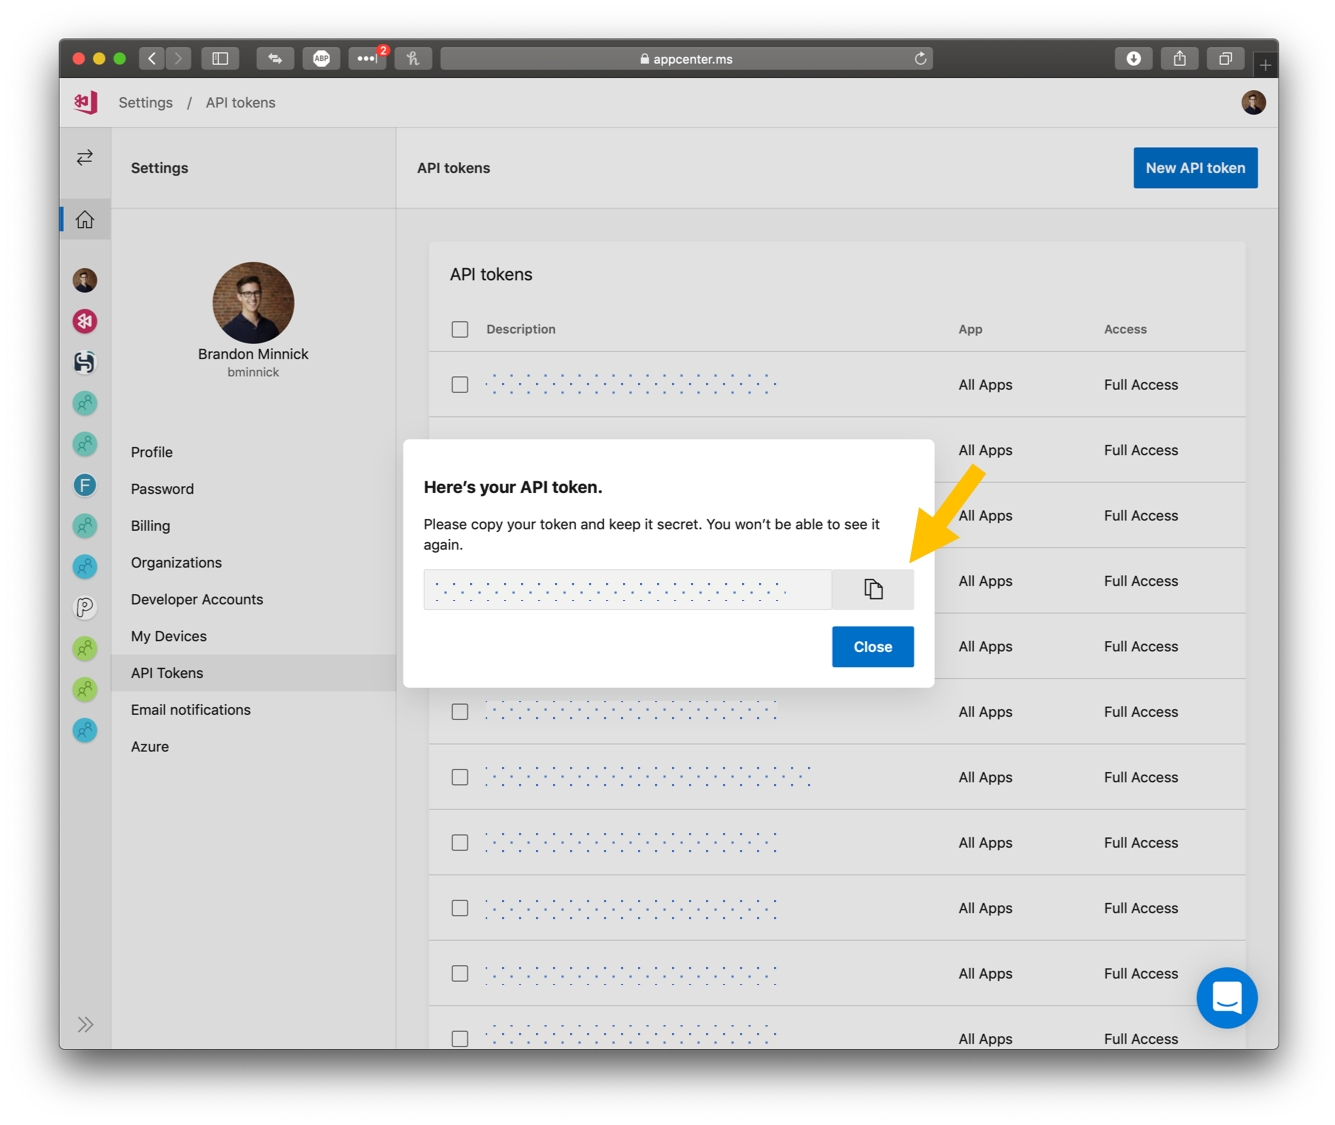
8. On the API Tokens page, click the copy icon to copy the API Token to the clipboard
- Note: We will use this API token later for our Azure Function
3. Create Azure Timer Function
Now, let's create an Azure Timer Function to schedule a recurring build
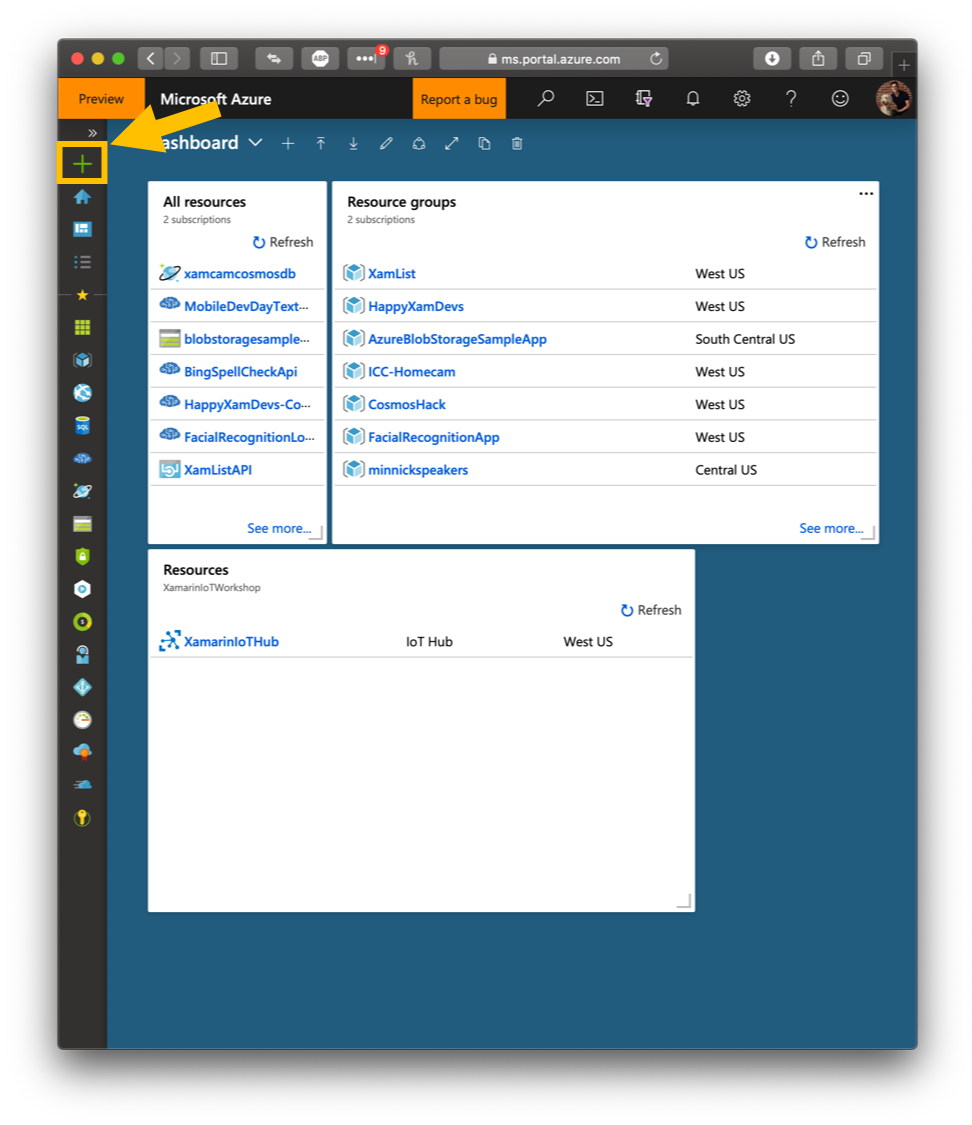
- In the Azure Portal, click the Create a Resource button
2. In the search bar, enter Function App
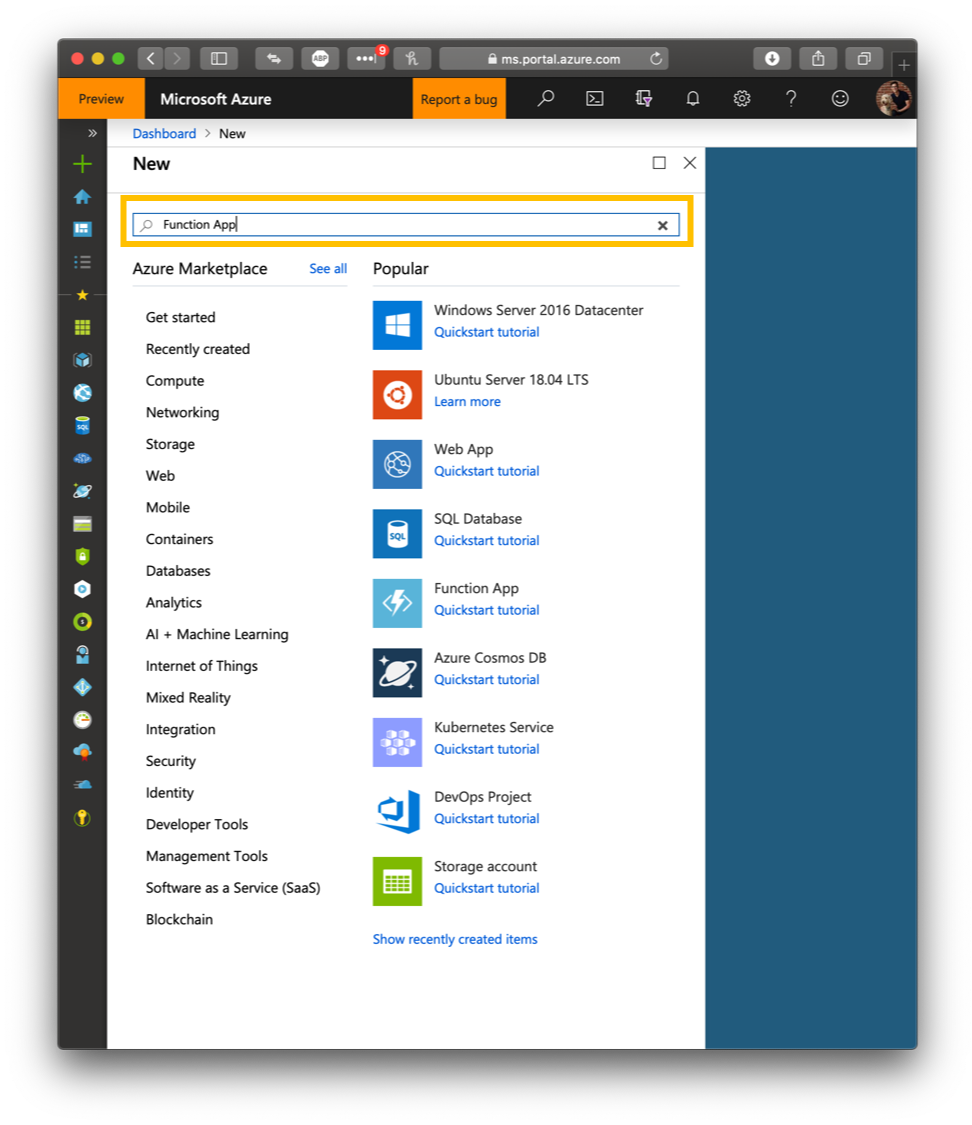
3. In the search results, select Function App
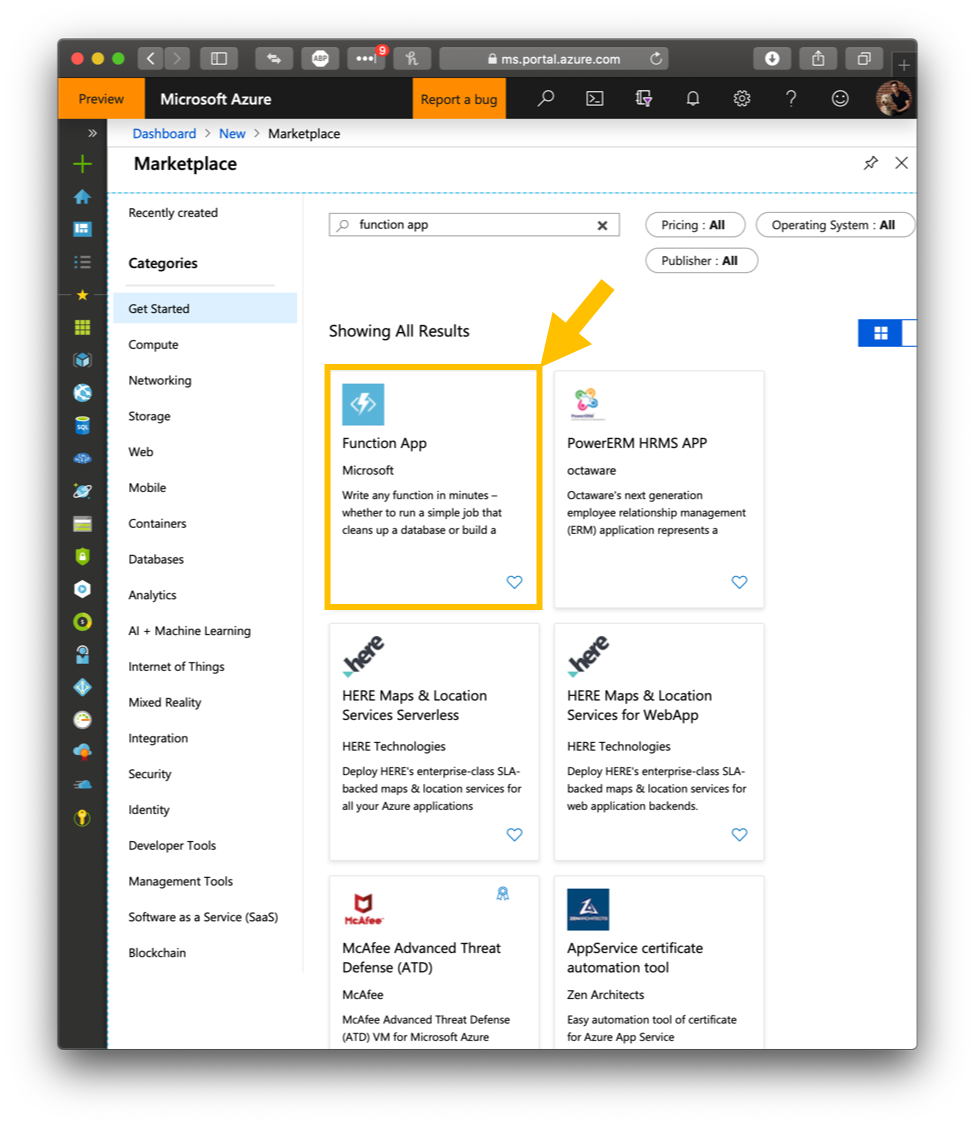
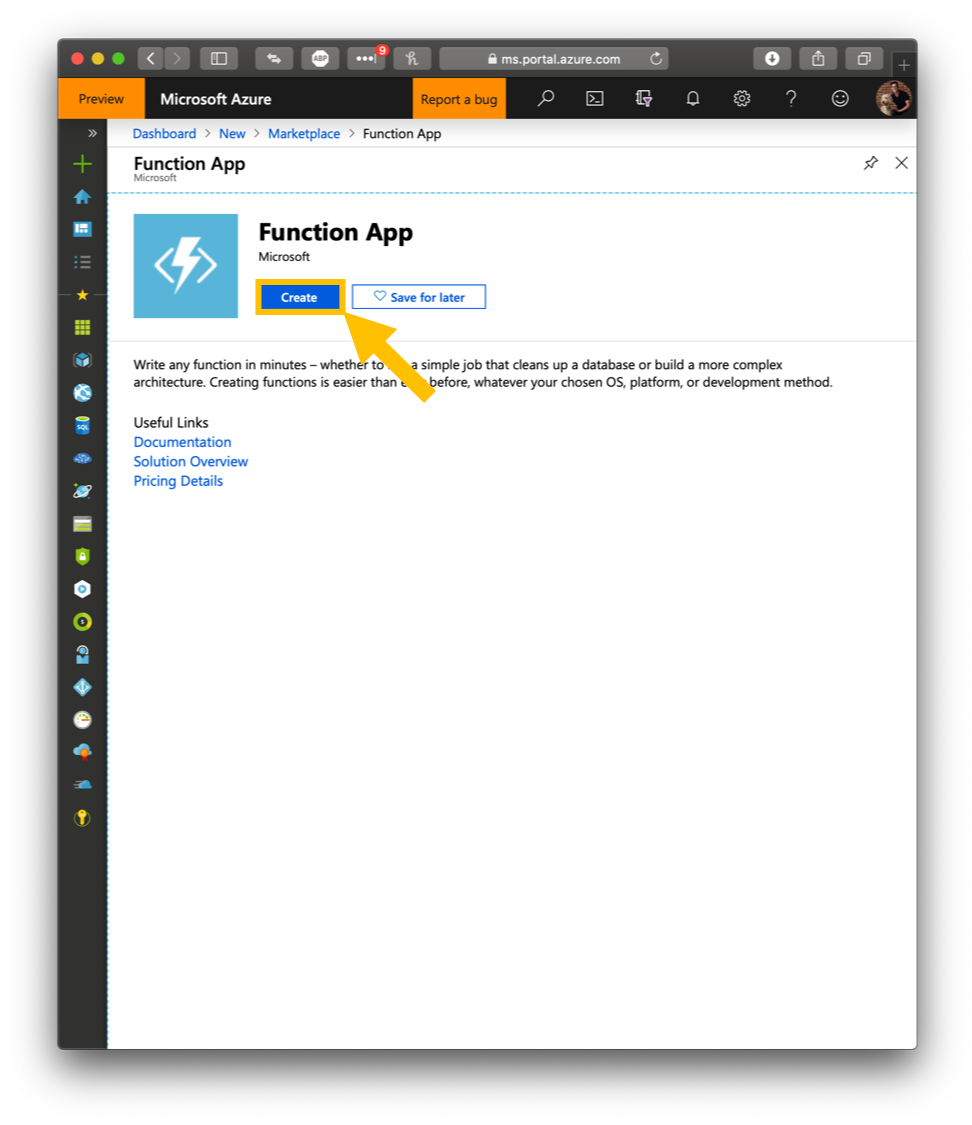
4. On the Marketplace Dashboard, select Create
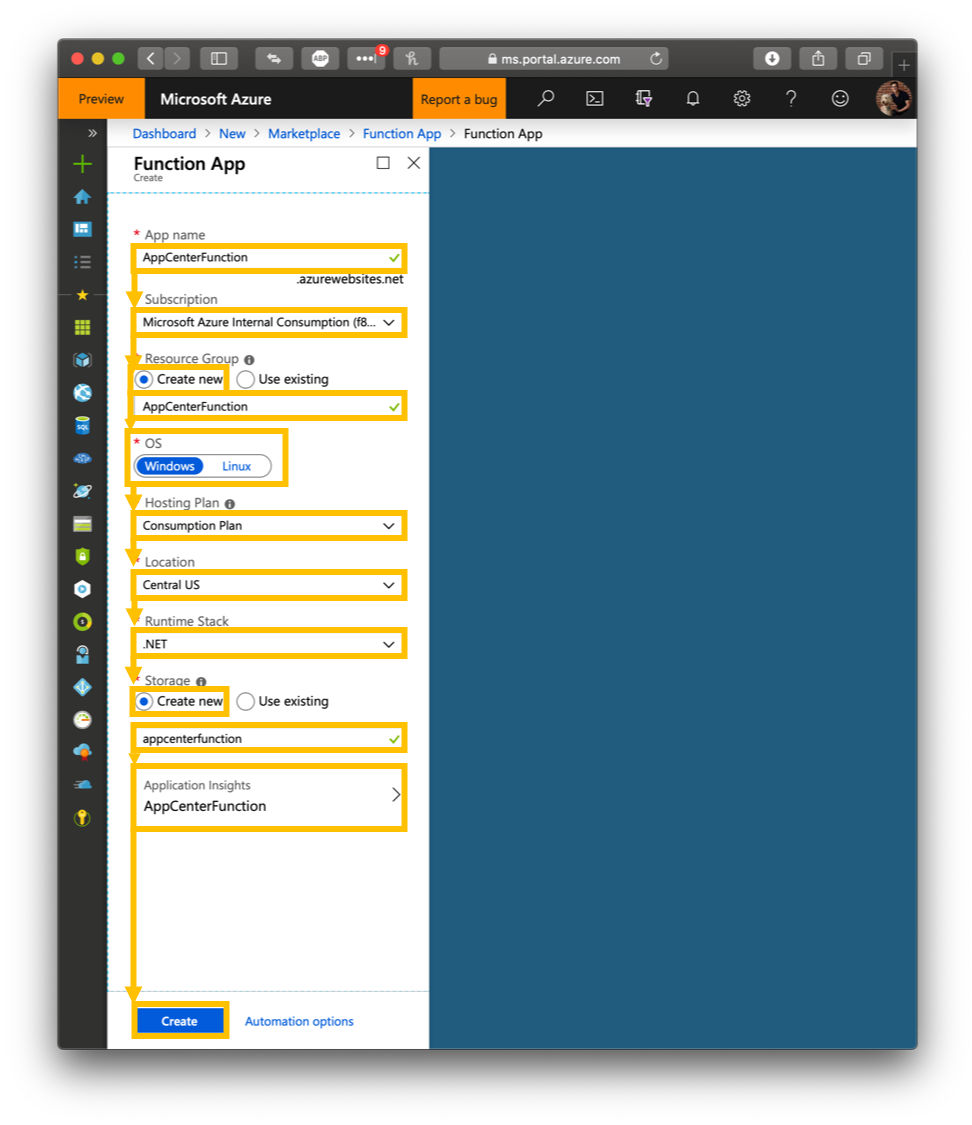
5. On the Create Function App page, enter the following details:
- App name: [Your function app name]
- Note: The app name must be unique as it is used in the URL
- Subscription: [Select your Azure Subscription]
- Resource Group
- Create New
- AppCenterFunction
- OS: Windows
- Hosting Plan: Consumption
- Location: [Select the location closest to you]
- Runtime Stack: .NET
- Storage
- Create New
- [Your storage account name]
- Application Insights: [Use defaults]
6. On the Create Function App page, click Create
7. Stand by while the Function App is deployed
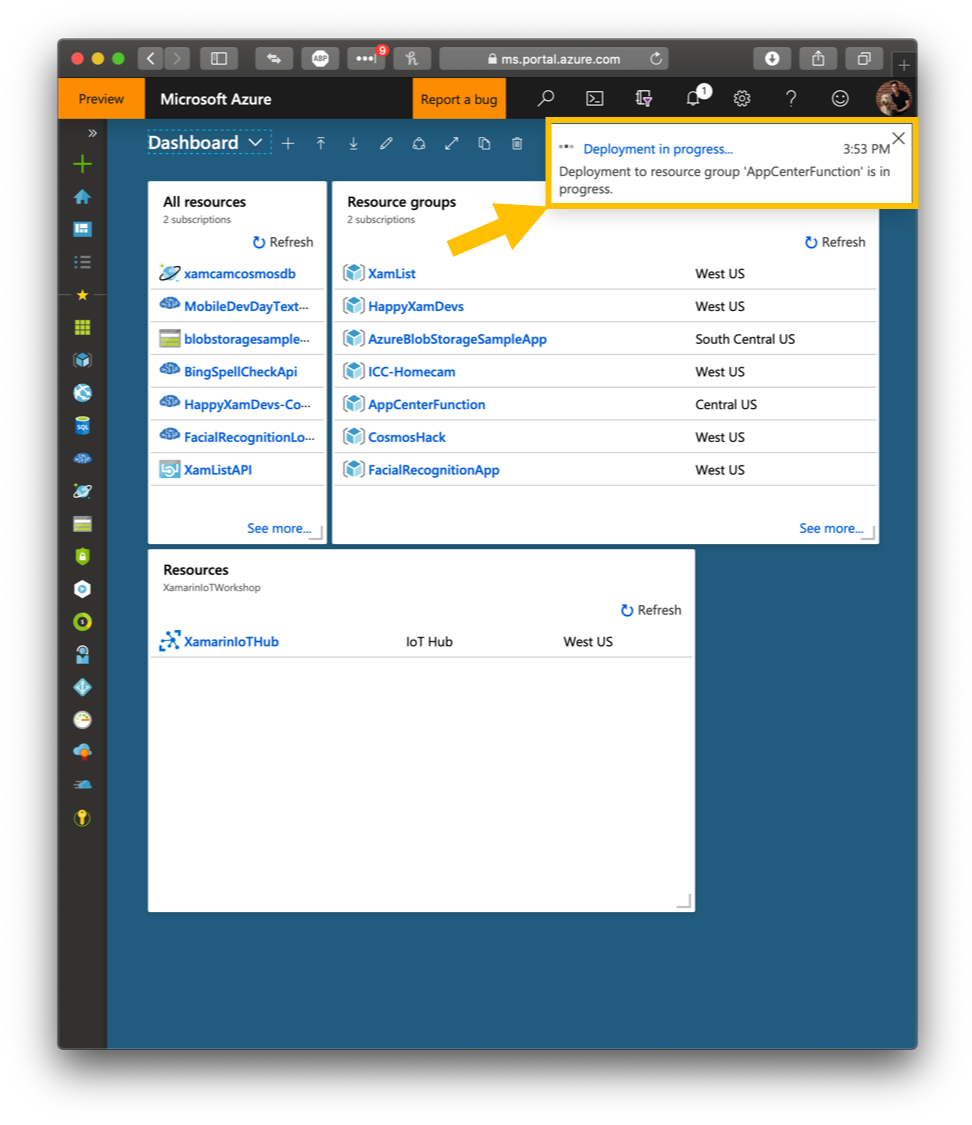
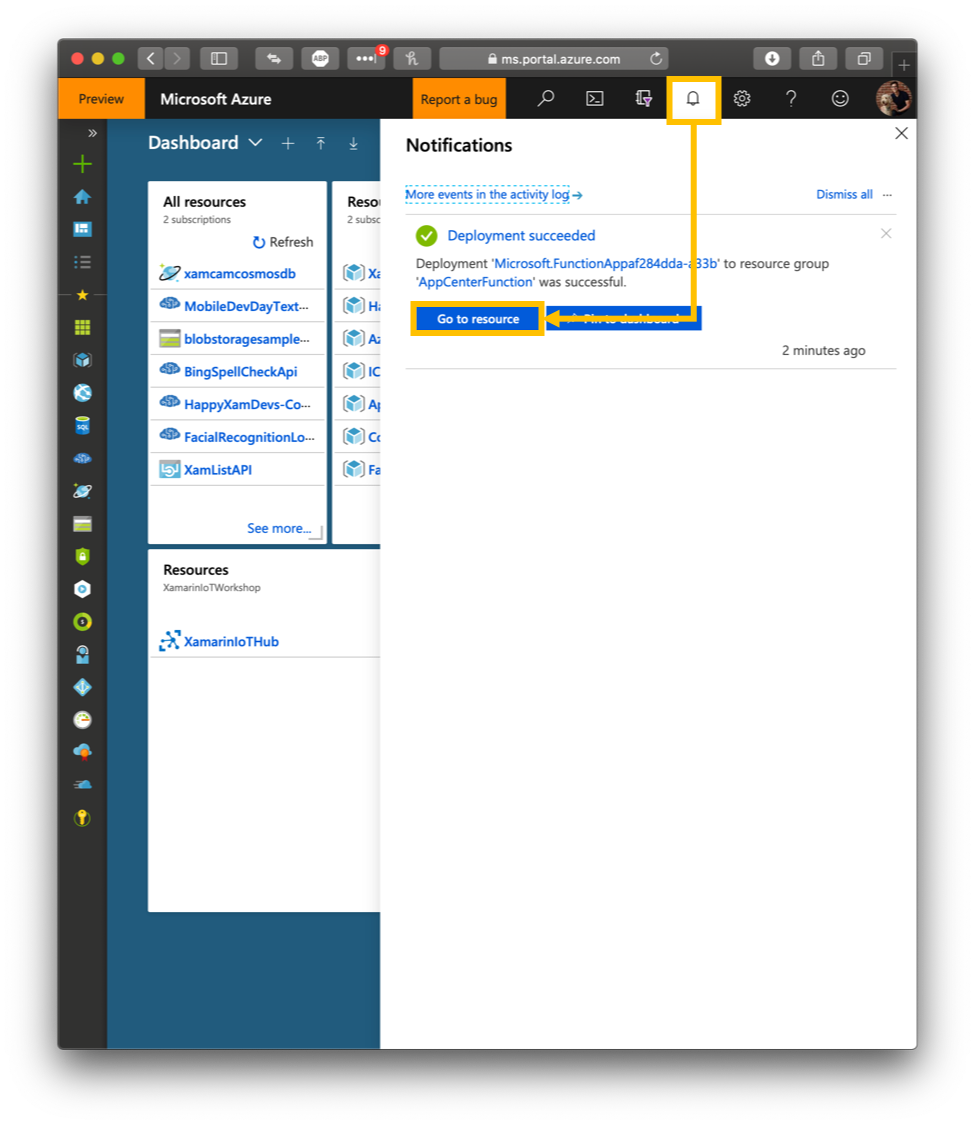
8. Once the deployment has finished, on the Azure Portal, select the notification button (bell icon)
9. In the Notifications menu, select Go to resource
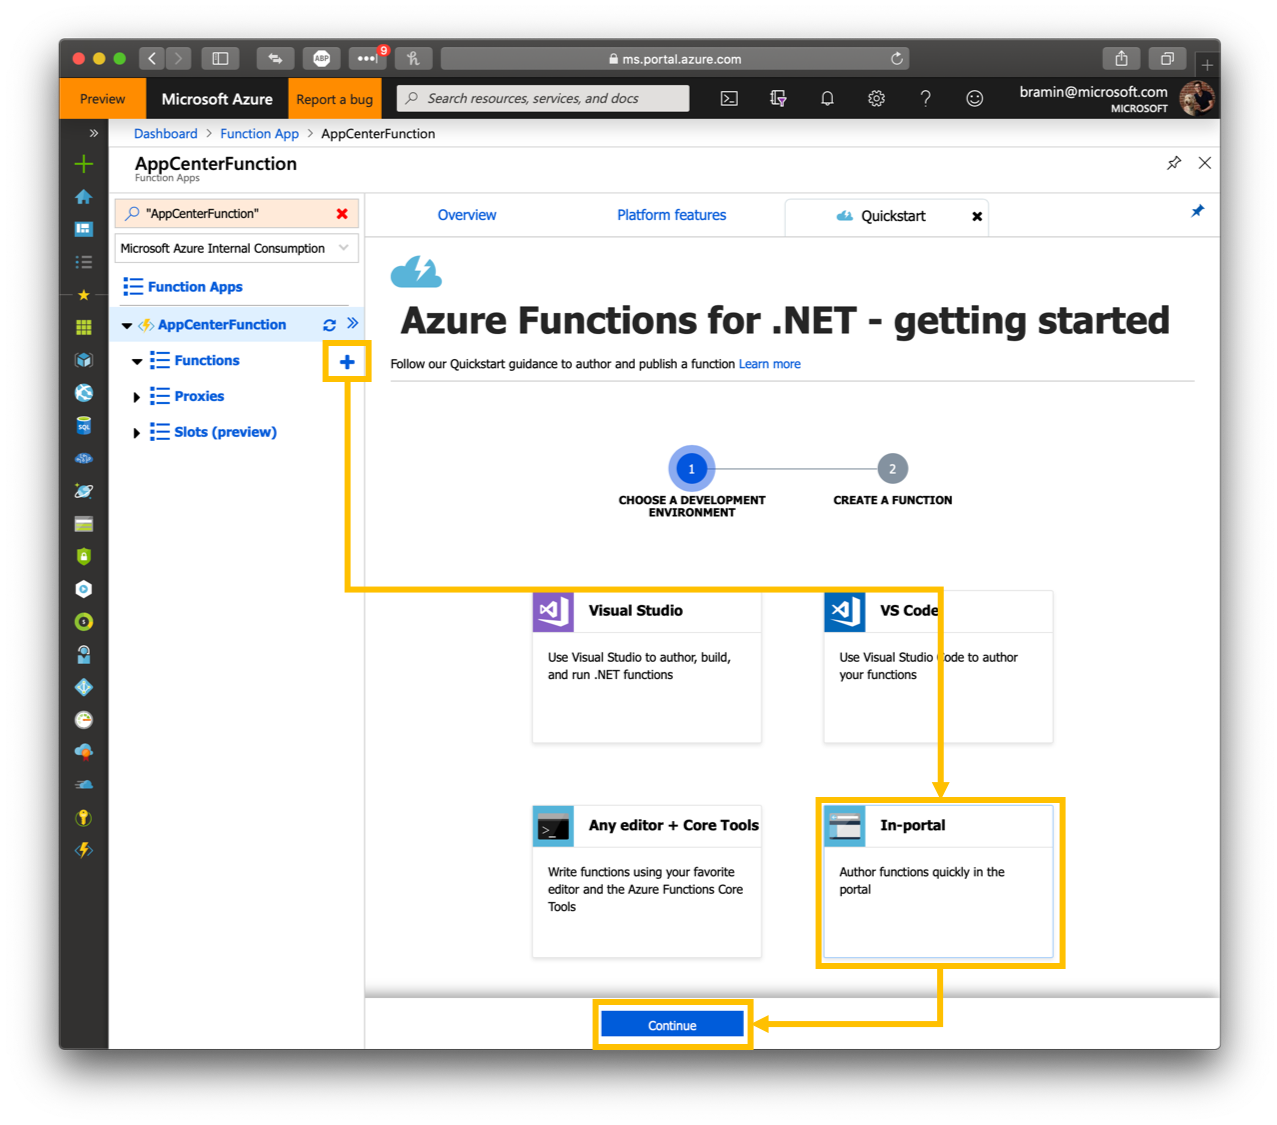
10. On the Function App Dashboard, next to Functions, click the Plus Sign (+)
11. On the Quickstart dashboard, select In-Portal
12. On the Quickstart dashboard, click Continue
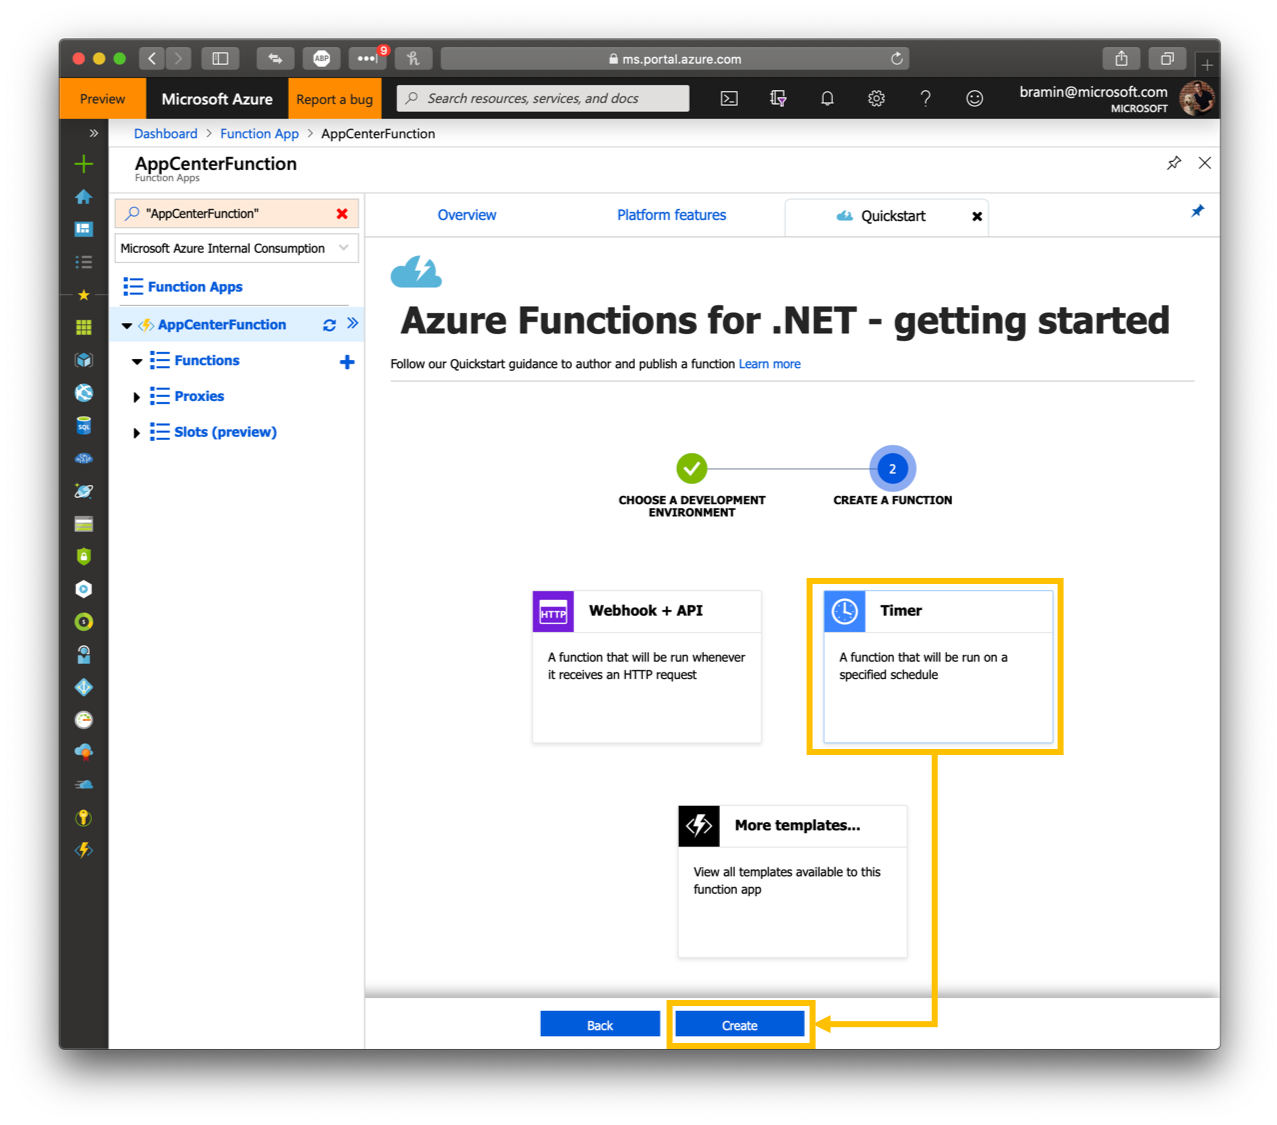
13. In the Quickstart dashboard, select Timer
14. In the Quickstart dashboard, select Continue
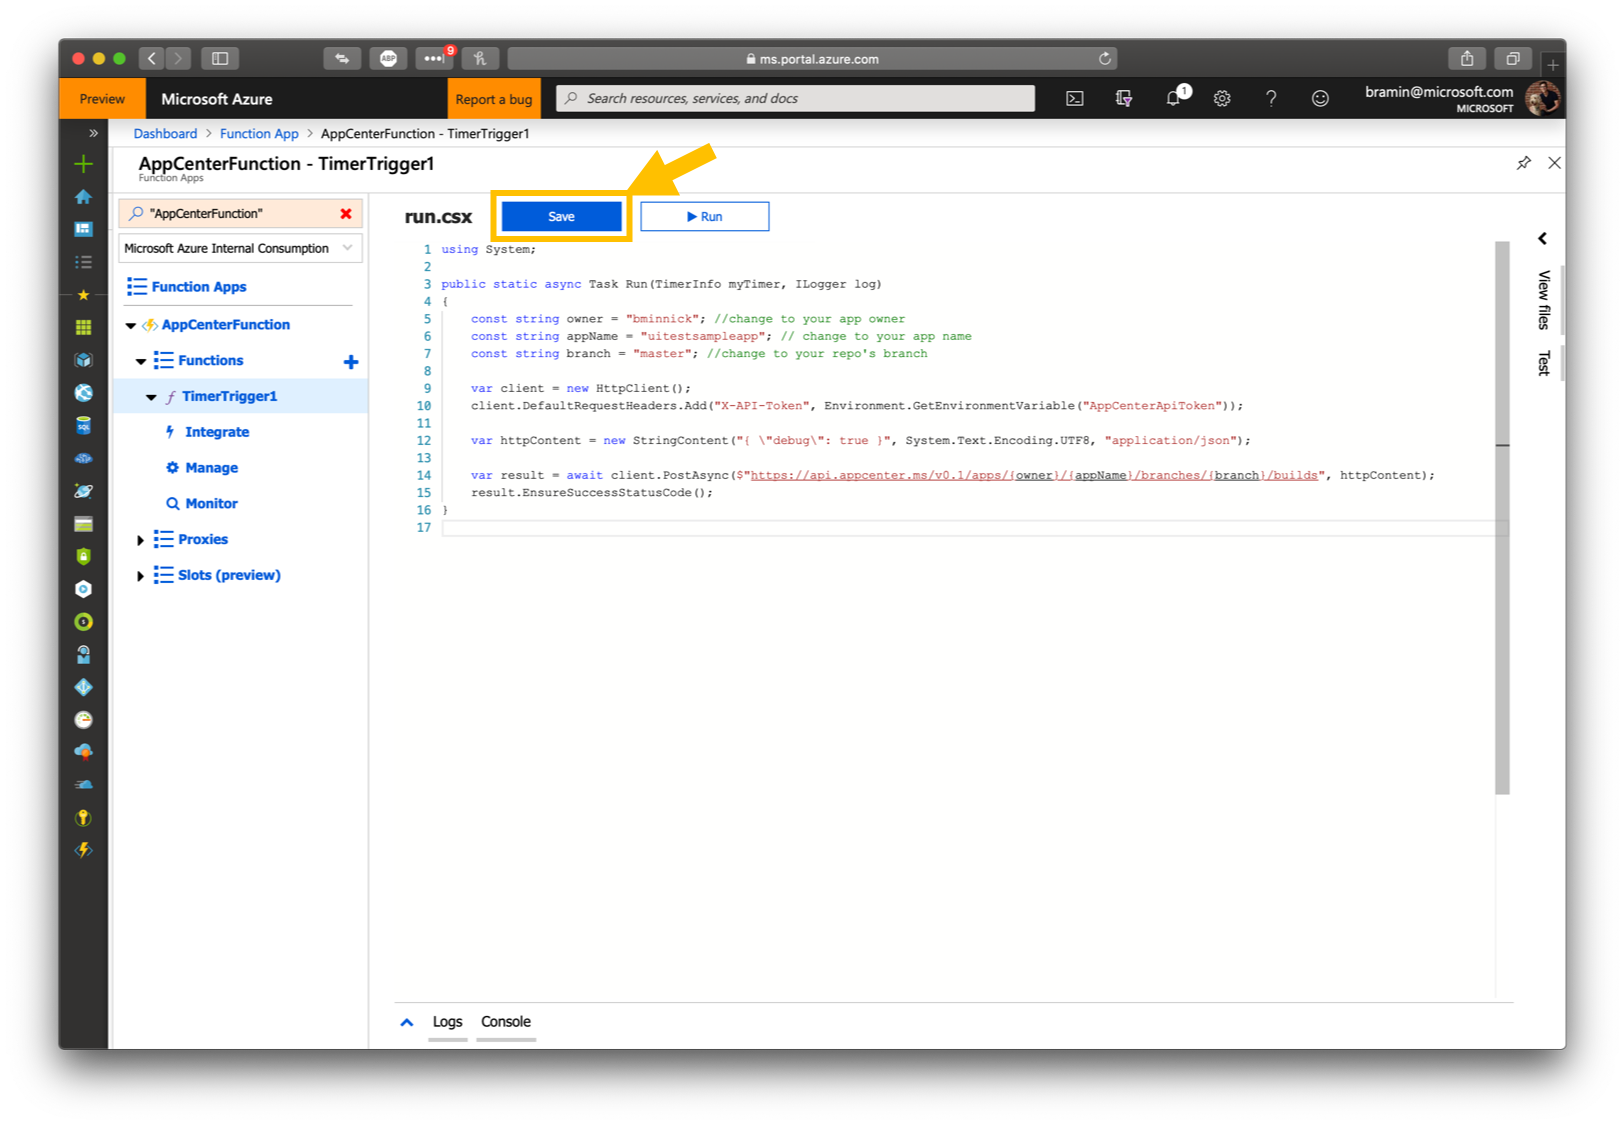
15. In the run.csx editor, enter the following code
- Note: Change
owner,appName, andbranchto match the values retrieved in the previous step, Get App Center Metadata
using System;

public static async Task Run(TimerInfo myTimer, ILogger log)
{
    const string owner = "bminnick"; //change to your app owner
    const string appName = "uitestsampleapp"; // change to your app name
    const string branch = "master"; //change to your repo's branch

    var client = new HttpClient();
    client.DefaultRequestHeaders.Add("X-API-Token", Environment.GetEnvironmentVariable("AppCenterApiToken"));

    var httpContent = new StringContent("{ \"debug\": true }", System.Text.Encoding.UTF8, "application/json");

    var result = await client.PostAsync($"https://api.appcenter.ms/v0.1/apps/{owner}/{appName}/branches/{branch}/builds", httpContent);
    result.EnsureSuccessStatusCode();
}
16. In the run.csx editor, click Save
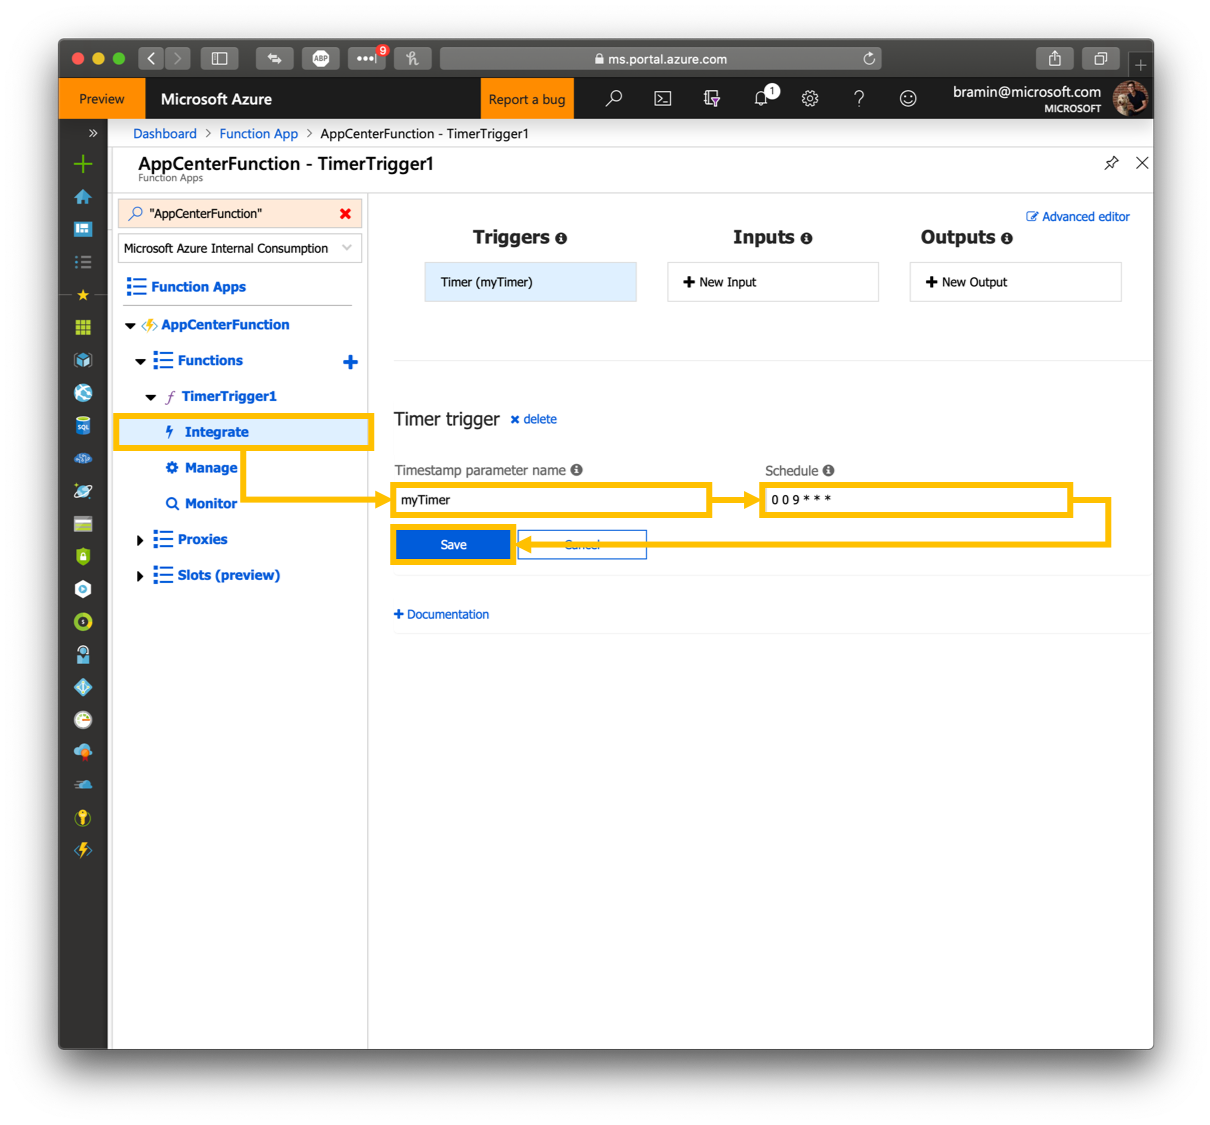
17. In the Functions Dashboard,on the left-hand menu, select Integrate
18. In the Integrate dashboard, in the Timestamp parameter name text box, enter myTimer
19. In the Integrate dashboard, in the Schedule text box, enter your cron schedule
- Note: I am using
0 0 9 * * *, which means my Timer Function will run at 0900 UTC every day
20. In the Integrate dashboard, click Save
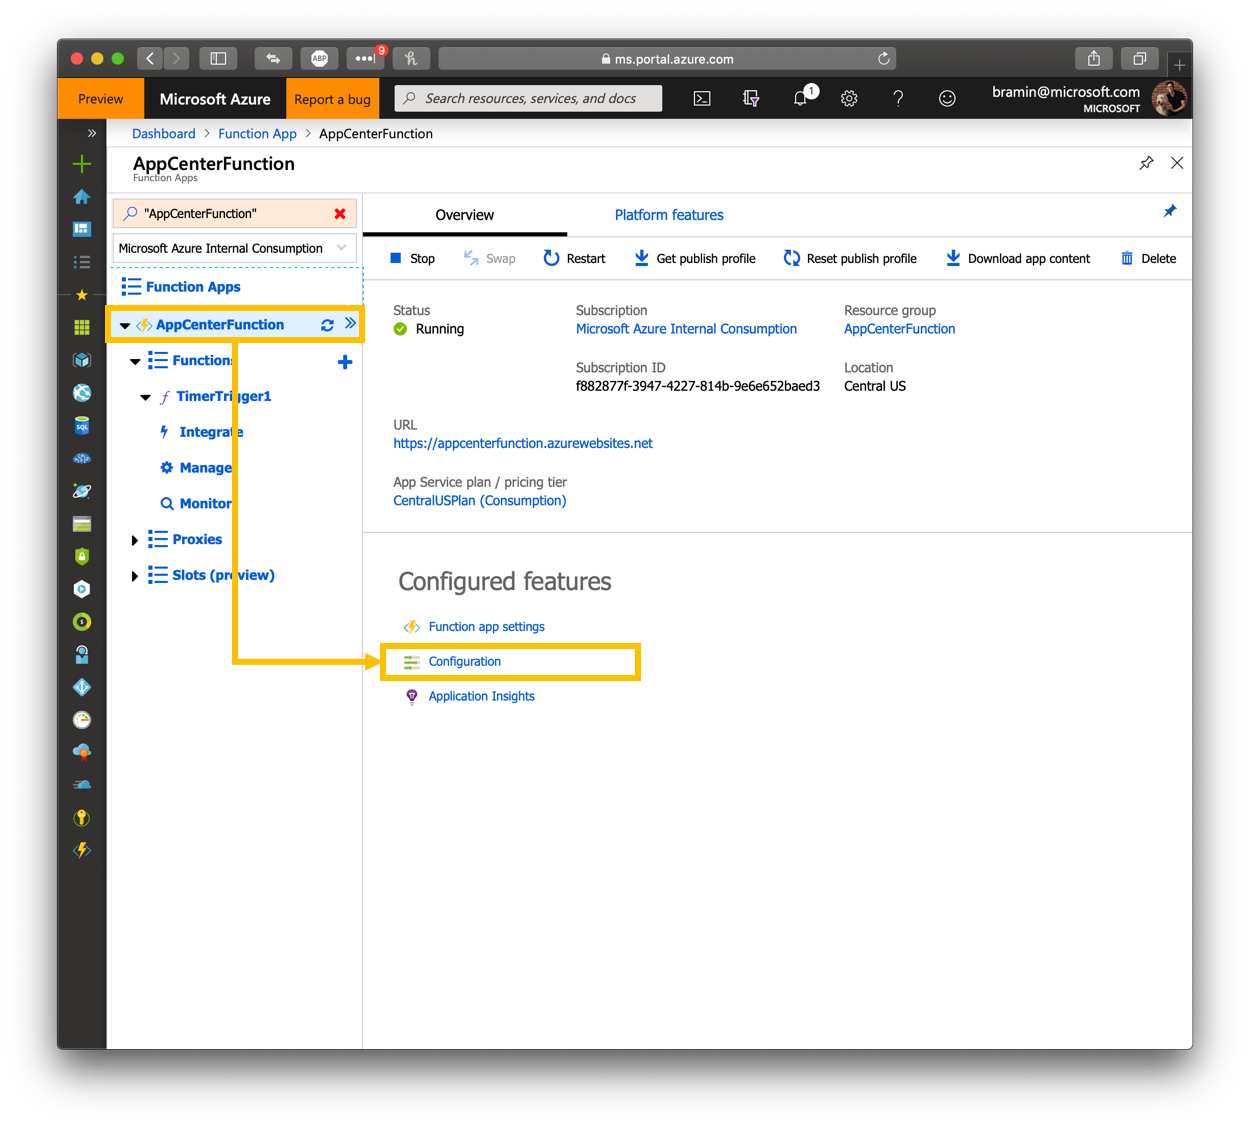
21. On the Functions dashboard, on the left-hand menu, select the name of your Function App
- Note: My Function App is named AppCenterFunction
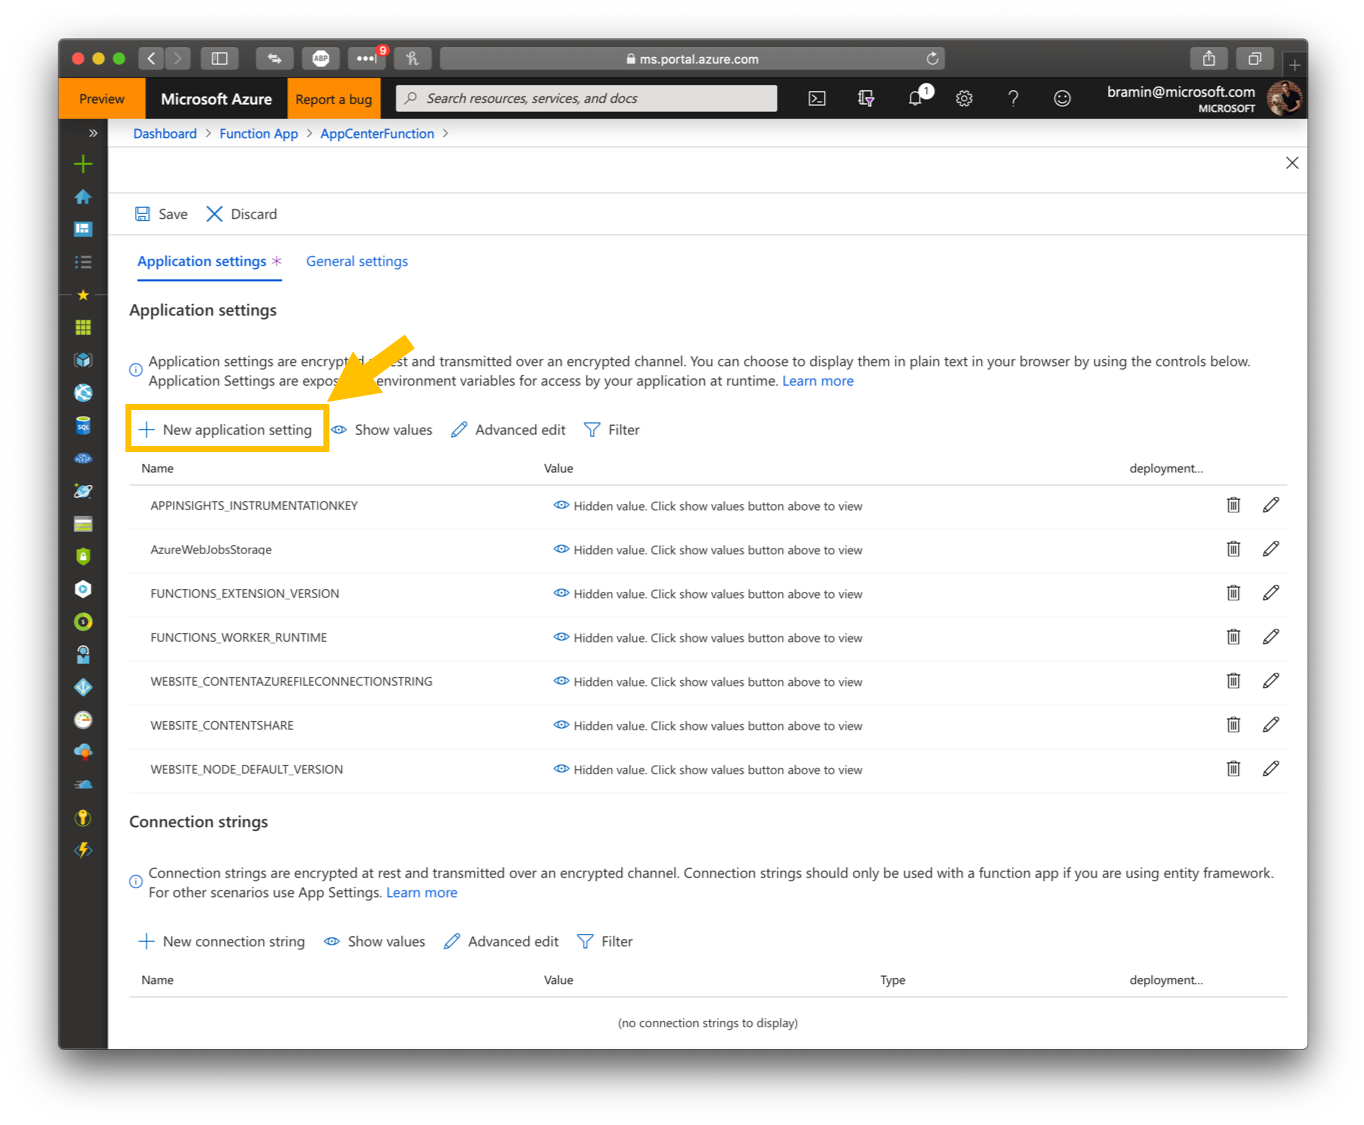
22. On the Functions Overview Dashboard, select Configuration
23. In Application Settings, click New application setting
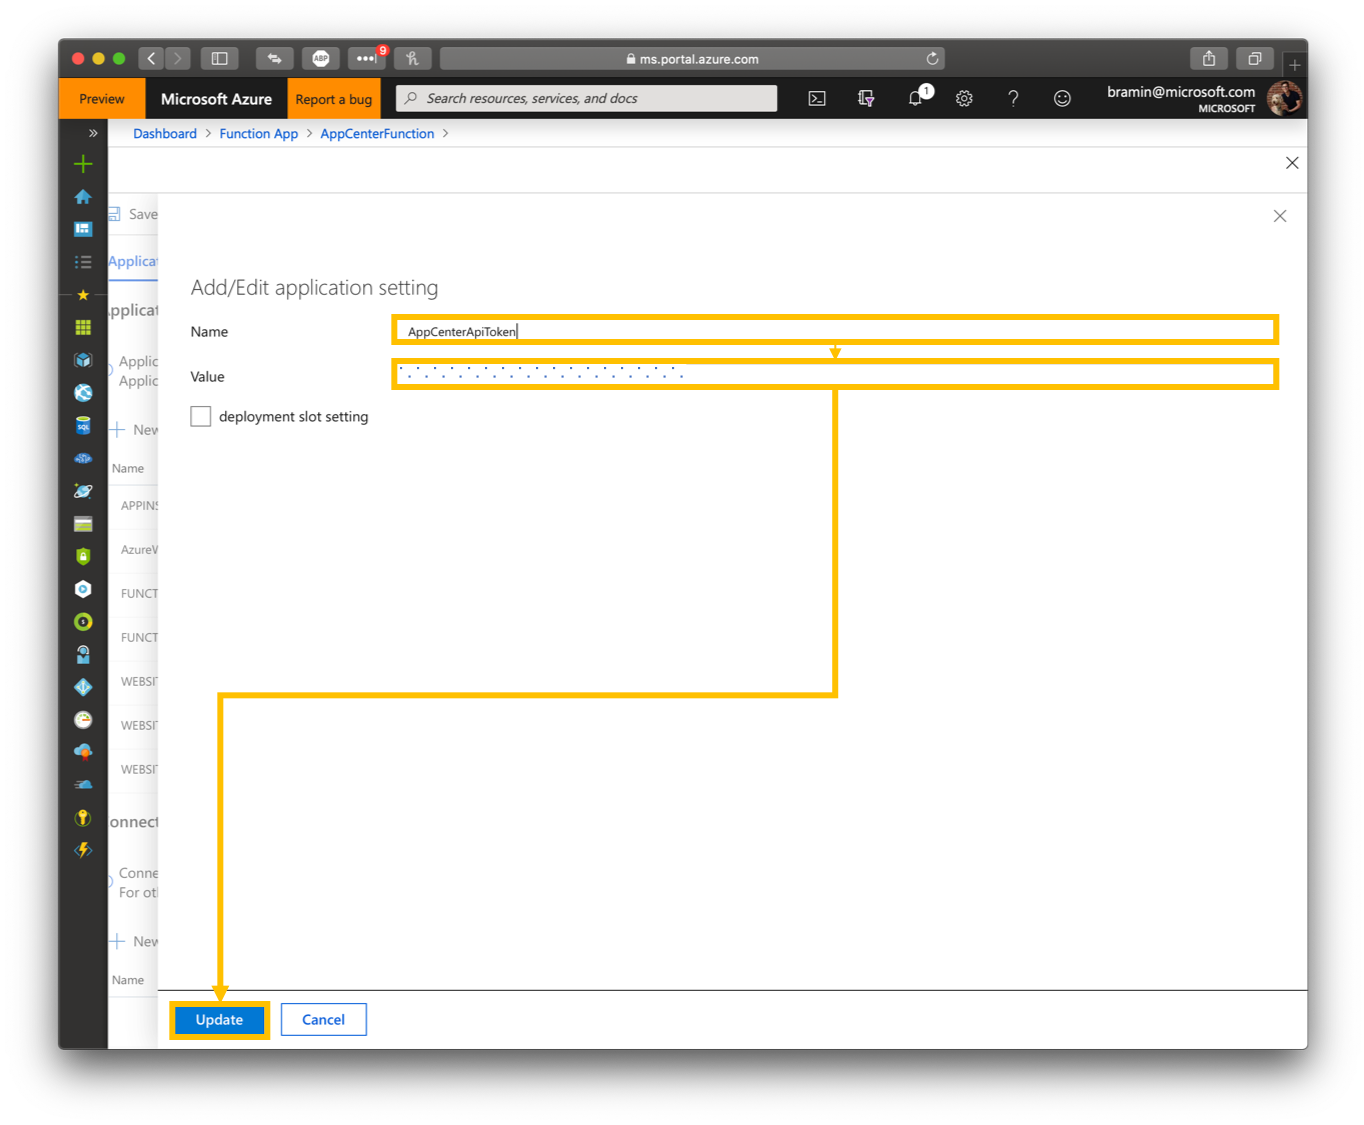
24. In the Add/Edit application setting window, in the Name text box, enter AppCenterApiToken
25. In the Add/Edit application setting window, in the Value text box, enter the App Center API Token generated in the earlier step, Generate App Center API Token
26. In the Add/Edit application setting window, click Update
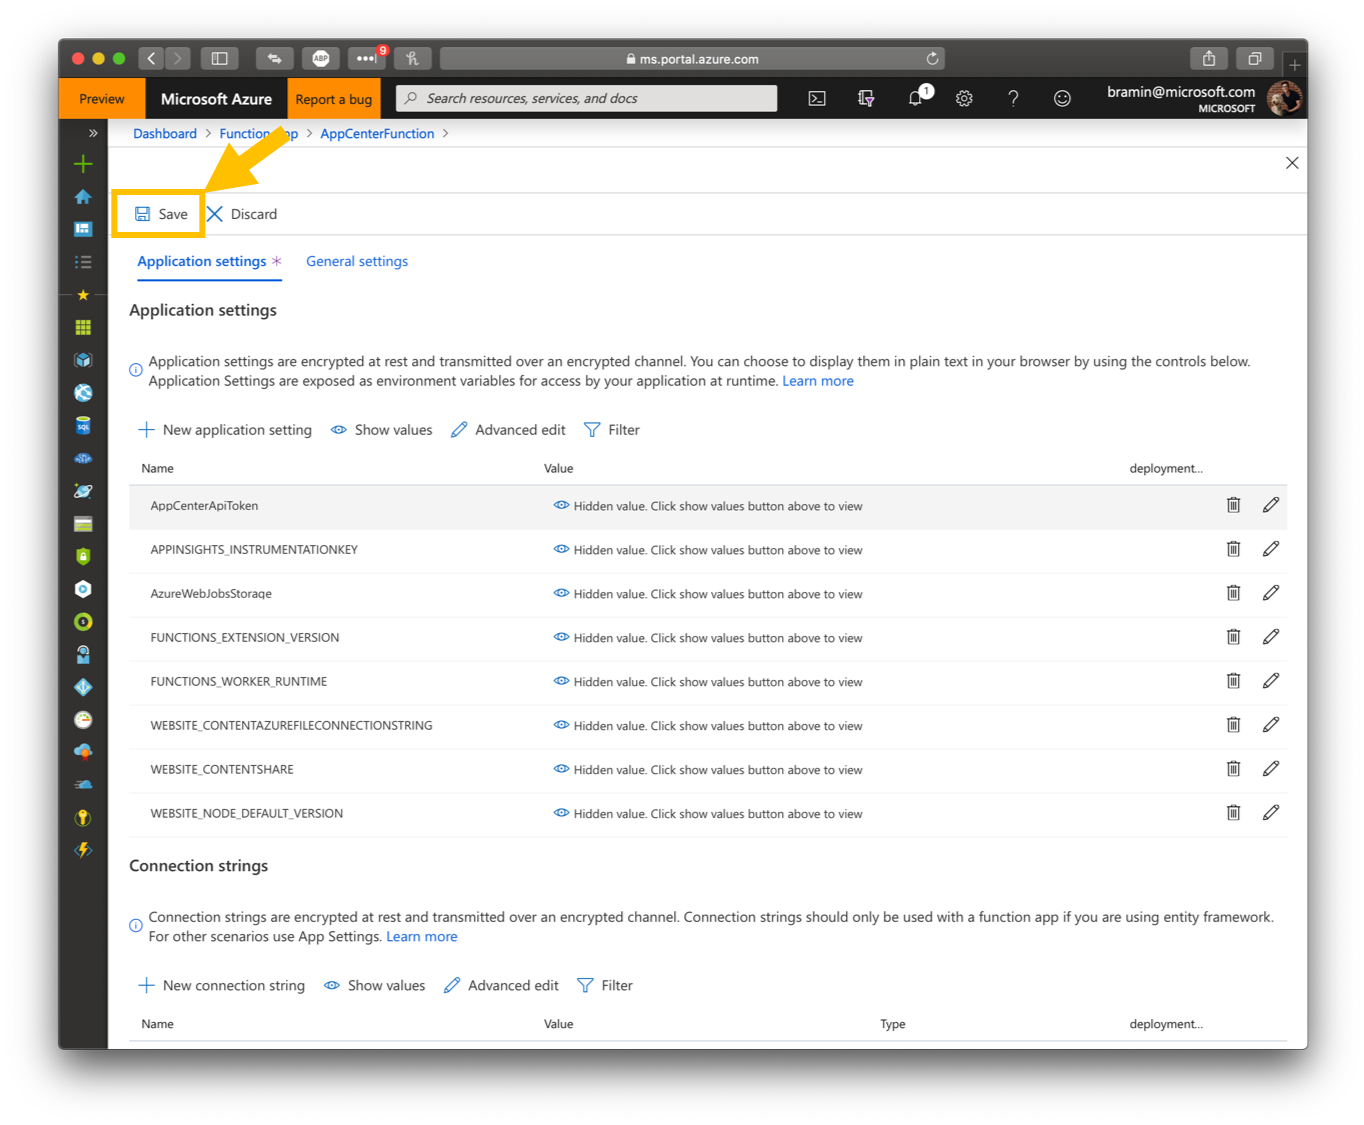
27. In Application Settings, click Save
That's it! We now have created an Azure Timer Function that will trigger an App Center Build.